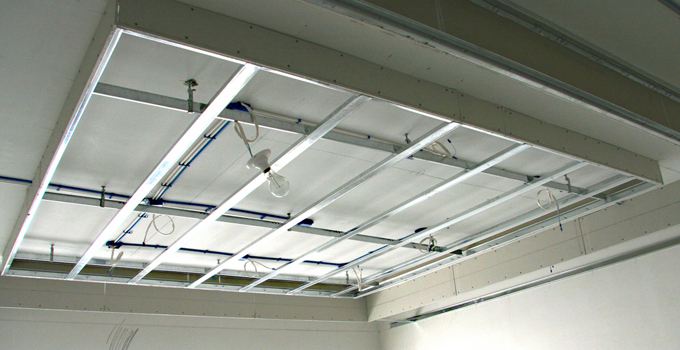
Light steel keel ceilings, which we often see as ceilings, especially sculpted ceilings, are made of light steel keel frames and covered with plasterboard. According to the different materials of the decorative board, the ceiling can be divided into gypsum board ceiling, metal ceiling, glass ceiling, PVC board ceiling. Gypsum board is relatively cheap, PVC board is the next, and metal board is the most durable but the price is relatively high. Now most families also use wood keels. Light steel keels also have a small part of the decoration materials and are used by people who require high quality decoration. What is the construction technology of the light steel keel ceiling ? I will introduce you in detail below.
Light steel keel ceiling construction technology
Preparations >>
1. The light steel keel ceiling project must be familiar with the construction site before construction. In the construction site of the light steel keel ceiling construction, the room needs to be clean, and the opening and the elevation of the bracket should be inspected; the installation of the equipment and piping in the ceiling and the pressure test of the pipeline should be accepted.
2. Before the construction of the light steel keel ceiling project, the familiarity with the construction site is eliminated, and the construction drawings and decoration design instructions are also familiar.
3, do a good job of construction records, collect all kinds of related documents. Acceptance records and re-inspection reports, technical disclosure records, and product qualification certificates and performance test reports.
4. Select the keel, fittings and cover panels according to the design requirements. The material types, specifications, and quality should all meet the design requirements.
5. For the re-inspection of harmful substances in the plates, the test results should meet the national environmental protection standards.
6. Pre-embedded items in suspended ceilings, such as rebars and steel booms, are subject to anti-rust treatment.
Construction process >>
The height of the ceiling elevation horizontal line - keel division line - fixed hanging rod - installation of the main keel - the installation of sub keel - keel skeleton full correction - installation of the cover - the installation of layering.
Construction points>>
1, the line
Use a spirit level to copy out the horizontal points on each wall (post) corner of the room, and pop up the horizontal line (horizontal line is generally 500mm from the ground), and use the horizontal line to the ceiling design height plus the thickness of the one-layer board, use the powder line along the wall (column ) The pop-up level is the lower skin line of the ceiling keel.
At the same time, the main keel is popped out of the concrete ceiling according to the ceiling plan. The main keel shall be divided from the center of the ceiling to two sides with a maximum distance of 1000mm. The keel of the boom shall be marked from the center of the ceiling to the two sides. The maximum distance shall be 1000mm and the fixed point of the boom shall be marked. The fixed point spacing of the boom shall be 900 One 1000mm. If the beam and pipe fixing points are greater than the design and specification requirements, the fixing point of the boom should be increased.
2, fixed hanging rod
Use expansion bolts to secure the hanger bar. Use an impact hammer to drill holes in the top plate and install expansion bolts. One end of the boom is welded with L30 x30 x3 corners (the hole diameter of the corners should be determined according to the diameter of the boom and expansion bolts), and the other end is welded with a threaded rod. A good boom should be treated for rust prevention. When the length of the boom is less than 1000mm, the concrete can be used to suspend the ribs; when it is greater than 1000mm, Na's ribs should be used.
On the ceiling of a person, when the length of the boom is less than 1000mm, the lifting bar of Na can be used; when it is larger than 1000mm, the lifting bar called is used. When installing the boom should also pay attention to: hanging rod should be straight and have a sufficient bearing capacity, when the rod needs to take long, it must be lap welded, the weld should be even full; ceiling lamps, tuyere and access, etc. Hangers should be added.
3, install the side keel
The installation of the side keel shall be carried out according to the design requirements, and the L-shaped galvanized steel strip shall be fixed on the embedded wooden bricks along the horizontal keel line on the wall (pillar); if it is a concrete wall (column), available shots The nails should be fixed and the spacing between the nails should be less than the sub-keel spacing.
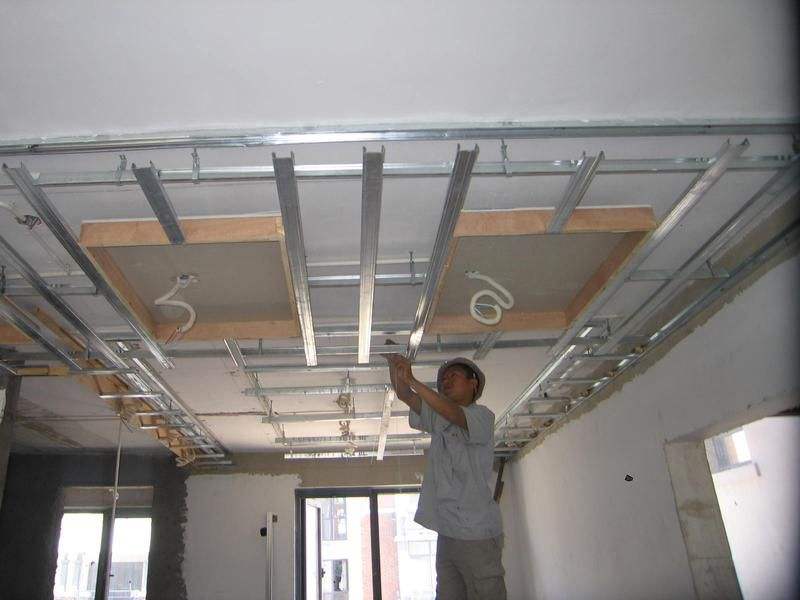
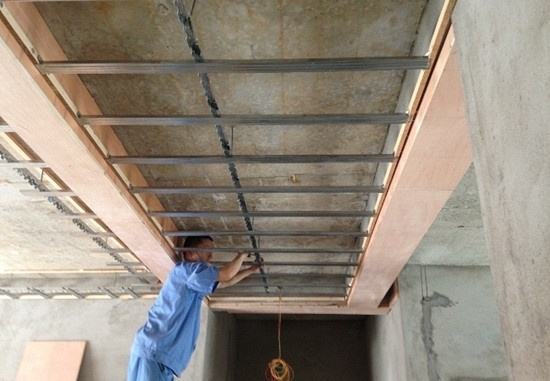
4, install the main keel
The main keel is hung on the suspender and should be installed parallel to the long direction of the room. The spacing should be 900-1000mm. The installation should be arched. The height of the arch is 1/200 to 1/300 of the room span. The cantilever section of the main keel should not be more than 300mm, otherwise booms should be added. The length of the main keel should be docked, and the butt joints of adjacent keels must be staggered. After the main keel is hung, it should be basically leveled.
Note: For ceilings with a span greater than the above, a large keel should be added every 1.5m on the main keel, and the vertical main keel is welded firmly; if there is a large styling top grid, the shape part is welded using angle steel or square steel frame, and The floor is firmly connected.
5, install sub keel
The sub-keel is divided into two kinds: Ming keel and dark keel. The sub-keel is divided into a T-shaped paint keel and a T-shaped aluminum alloy keel. Various bar-shaped buckle plate manufacturers are equipped with a special keel. The secondary keel should be installed close to the main keel with a spacing of 300 - 600mm. The secondary keel is fixed on the main keel with a T-shaped galvanized iron sheet connection. Both ends of the secondary keel should be placed on the horizontal flange of the L-shaped keel. The gusset plate has a dedicated female horn as the side keel.
6, skeleton skeleton correction
After the complete inspection and correction of the keel skeletons installed in place, the structural position and level of the primary and secondary keels are all qualified, and all the hangers and connectors are tightened and clamped securely so that the overall skeleton is stable and reliable.
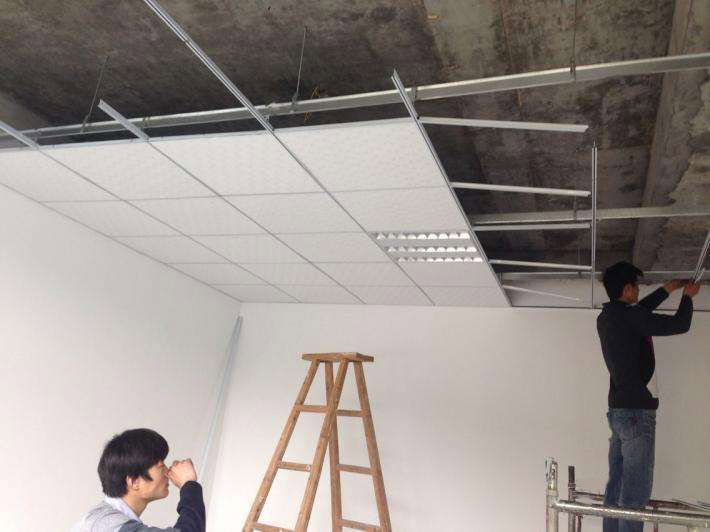
7, install the cover panel
The long side of the gypsum board should be laid along the longitudinal sub-keel; the distance between the self-tapping screw and the edge of the gypsum board should be 10~15mm, and the edge of the board should be 15~20mm. The decorative panel should be fixed in the free state to avoid the phenomenon of curved edges and convex drums.

8, brush anti-rust paint
Light steel skeleton cover panel roof, the surface of the welding place without rust treatment (such as embedded, hanging pieces, connecting pieces, nailing accessories, etc.), antirust paint should be brushed before handing. This process should be performed before the enclosure panel.
Light steel keel ceiling installation precautions
1. When installing the big keel, if the boom is uneven, it will cause the ceiling to be uneven. Therefore, during the construction, it is necessary to check the tightness of the hoisting point and check whether the elevation and flatness are in line with the specifications.
2, in the construction, to pull the line to find out, we must pay attention to the specifications of the plate construction, to ensure that the square is straight, so as to avoid the gap is not straight.
3, in the construction, to be fixed after the positive, so as to avoid the pressure of the seam, the pressure of the article is not strict, uneven situation.
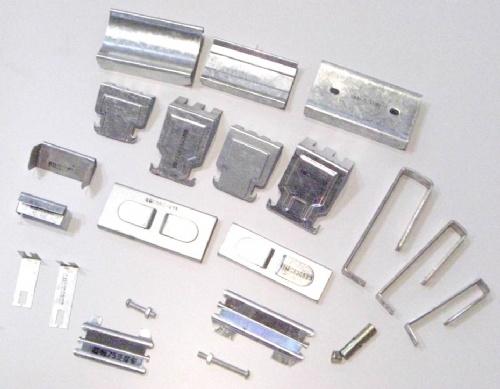
Tips: Light Steel Keel Accessories
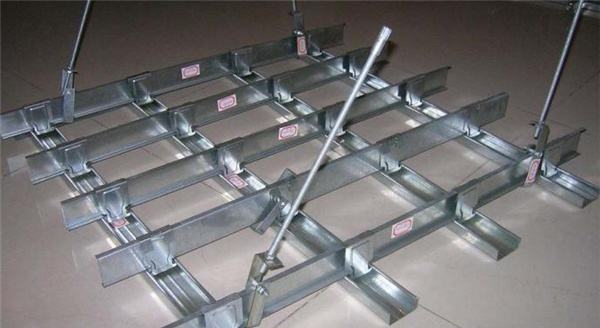
1 Main keel: It carries the weight of all suspended ceilings;
2 pairs of keel: it has the function of hanging gypsum board, of course, can also be used for cross bracing keel;
3 side (corner) keel: fixed and horizontal positioning around the ceiling, making access holes;
4 Main and auxiliary keel connections: As the name implies, it is used to connect the main and auxiliary keels;
5 Hanging: It is used for the connection between the main keel and the suspender;
6 main (deputy) keel connector: Needless to say, it is used to connect the main (deputy) keel;
7 boom: it will also carry the weight of the entire ceiling;
8U-type mounting clip: It is used to fix the auxiliary keel and adjust the surface smoothness of the auxiliary keel.
Editor's summary: The relevant contents of the light steel keel ceiling construction technology and installation considerations for light steel keel ceilings are introduced for everyone. I hope the above content can help everyone. For more information, please continue to follow our website information channel!
Light steel keel ceiling Chinese style corridor ceiling living room ceiling decoration renderings Mediterranean indoor ceiling two bedroom ceiling
Natural Ledgestone panels are made from hand selected pieces of natural stone that fit together for easy installation. The range of color in each panel is exquisite. Each are composed of thin rectangular and square pieces of stone. These thin, lightweight stone panels are a perfect alternative to larger natural stone pieces and create a seamless, modern finish.
These items are a perfect complement for inside and outside wall,bathrooms,backsplashes,flooring,and fireplaces.The combination of designs that can be created from these products are endless.
Natural Ledgestone
Natural Ledgestone,Ledgestone Panels,Natural Stone Panel,Natural Stone Veneer
HEBEI DFL STONE , https://www.dflstone.com