What Geotextiles Should I Use for My Patio Sub Base, and How Do I Use Them?
If you're planning to build a new patio or renovate an existing one, the sub base is one of the most crucial elements to get right. Think of it as the foundation of your patio — a solid sub base ensures a long-lasting, visually appealing outdoor space. In this guide, we'll walk you through the key steps in creating a sub base for your patio, including which materials to use and the specific geotextile membranes that are ideal for the job. We'll also explain why these membranes are essential and how to properly install them. **Step 1: Preparing the Surrounding Area** Before starting your patio project, it's important to clear and level the area where your patio will sit. Begin by digging out any excess soil with a shovel or excavator, removing debris and vegetation as you go. Once the area is cleared, ensure it's as level as possible by filling in any dips or hollows. A flat surface is critical for proper drainage and stability. **Step 2: Installing the Geotextile Membrane** With the groundwork complete, it’s time to lay the geotextile membrane. These membranes come in two main types: woven and non-woven. A non-woven geotextile like the Terram T1000 allows for excellent drainage due to its needle-punched construction, which creates countless tiny holes that permit water to pass through. This makes it ideal for areas where drainage is a priority. On the other hand, a woven geotextile consists of fibers woven together, offering limited water permeability. While some water can still pass through, woven membranes aren't recommended when drainage is needed. For most standard patios, drainage isn't typically required under the surface, so a woven geotextile membrane will suffice. Its primary purpose is to prevent the sub base material from mixing with the soil beneath, avoiding issues like settling, sinking, or uneven surfaces. To lay the membrane, simply unroll it across the entire area, ensuring there’s at least a 300mm overlap between sections. You can secure the membrane using plastic ground fixing pegs, though often the weight of the sub base materials is enough to hold it in place. **Step 3: Adding the Sub Base Materials** Now that the area is prepped and the membrane is in place, it's time to add the sub base materials. Crushed stone, gravel, or sand are common choices. Crushed stone or hardcore is generally preferred because it’s easy to work with yet provides greater durability compared to sand. Gravel can enhance drainage if necessary, while sharp sand can serve as a binding layer, though it’s not typically recommended as a standalone base due to its instability. When spreading the sub base material, aim for even distribution, ensuring there are no gaps or low spots. A rake works well for this task. **Step 4: Compact the Sub Base** The next step is to compact the sub base to create a strong, stable foundation for your patio. A vibrating compactor plate is the best tool for this job, as it compresses the sub base effectively using vibrations. For smaller areas, a manual tamper can be used, though it’s far less efficient and more labor-intensive. During this process, consider the slope or fall of the patio to ensure water drains properly in the desired direction. After compacting, apply a thin layer (around 10mm) of sharp sand as a binding coat. **Step 5: Complete the Patio Construction** Once the sub base is complete and properly sloped, you can start laying your paving slabs. Depending on your chosen materials, this may involve several steps, whether you're working with paving slabs or pavers. We hope this guide clarifies the role of geotextile membranes in patio sub base construction. If you have any questions or need further advice, don't hesitate to reach out!Shop Geotextiles:
Sale!
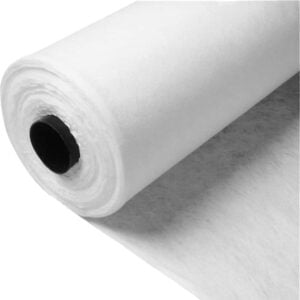
Terram T1000 Non Woven Geotextile Membrane – Custom Size
(82)
From £15.54 Excl. VAT
Select options
Sale!

Black Woven Geotextile Membrane For Driveways etc – Custom Sizes
(12)
From £17.89 Excl. VAT
Select options

Out of stock
Extrafix Plastic Ground Fixing Pegs
(1)
From £1.82 Excl. VAT
Select options
Cold room doors are specially designed for cold rooms, cooler rooms or refrigeration warehouse. It can be sliding type or swinging type design. And sliding type door can be automatic or manual. Made from thick polyurethane foam sandwich panel, cold room doors are with excellent therma insulation performance.
Cold Room Doors,Cold Storage Door,Cool Room Doors,Cold Store Doors, Cold Room Sliding Door, Cold Room Swinging Door, Refrigeration Door
SHANGHAI KENVO DOOR CO.,LTD , https://www.kenvodoor.com