The wall-mounted toilet is suspended from the wall. And this new type of innovative design has also been popular and loved by many consumers, people are new to the wall-mounted toilet. However, foreign countries are already eccentric about this kind of wall-mounted toilets. Most of the young people in the country have also developed a strong interest in wall-mounted toilets in order to emulate foreign fashion homes.
Then how to install the wall-mounted toilet? You can understand the 7 steps of the wall-mounted toilet installation together with Xiaobian.
7 steps for wall-mounted toilet installation: first set tank height
7 steps for wall mounted toilet installation
Step 1: Adjust the height of the tank
Side-press water tank: According to the thickness Xcm of the decorative layer, the horizontal line from the upper white block of the bracket to the bottom of the bracket can be adjusted to 100cm+Xcm.
Top-press water tank: According to the thickness of the decorative layer Xcm, from the top of the bracket to the bottom of the adjustable foot of the bracket is 82cm + Xcm. The bracket adjustment foot can only be adjusted to a maximum of 20 cm without special lengthening.
Step 2: Fixing screws
The installation of the water tank bracket is mainly fixed by 4 screws, two on the upper part of the bracket and two on the support foot; at the same time, all the screws on the water tank bracket must be fastened.
The surface of the tank bracket should be horizontal and the vertical of the facade should be installed during installation.
The third step: the water pipe connection
The water supply pipe of the water tank is connected to the water supply pipe (hard pipe) of the water tank.
It is strictly forbidden to install the matching angle valve in the water tank outside the cabinet to avoid opening and closing the angle valve when the water tank is cleaned and repaired.
It is strictly forbidden to connect the water supply pipe and the water tank angle valve with a hose. The pipe pressure and the quality of the hose may cause leakage. In case of leakage, the false wall must be damaged to repair.
Step 4: Drain installation
If the concealed water tank is installed in the original pit position, the short pipe connecting the water tank and the drain pipe must be larger than φ90 to prevent clogging.
Step 5: Protection device installation
All protective devices should be installed before the installation of the false wall and the decorative layer.
Install the screw protection hose and divide it into two parts, which are respectively placed on the front and rear ends of the screw to avoid clogging the screw hole when installing the dummy wall or installing the decorative layer.
The sixth step: fake wall production
Light steel keel + moisture-proof gypsum board
The surface of the light steel keel and the water tank bracket shall be flat. The water tank protection frame, the flushing pipe, the drain pipe and the screw position shall be reserved on the gypsum board, and the gypsum board surface shall be closely attached to the surface of the bracket and fixed. The water tank bracket is filled with brickwork or concrete below the elbow of the toilet to avoid rupture of the decorative material when the plasterboard is not in close contact with the bracket.
Gray brick + steel mesh
Brickwork is placed on the edge and gap of the tank bracket to keep it flat with the surface of the bracket. The water tank bracket is integrally sealed with a wire mesh slightly larger than the bracket, and the wire mesh is fixed on the brick wall. Two layers of wire mesh can be sealed if necessary.
Red brick
The red brick is sealed at the edge and the gap of the water tank bracket, and the water tank is built with a red brick wall of about 50mm in front of the water tank, and the water tank protection frame, the flushing pipe, the drain pipe and the screw position are reserved. The minimum thickness of red brick is about 50mm.
Step 7: Hanging toilet installation
After the fake wall is finished, the tiles have been attached. The soundproofing pad is attached to the decorative wall, the pipe is measured and cut, and then the toilet is installed according to the position of the screw. The length of the screw exceeds the surface of the ceramic, and the toilet is fixed on the wall. When installing the wall-mounted toilet, pay attention to adjust the horizontal position of the toilet. After the installation is completed, cut off the excess sound insulation mat and you're done.
Stainless Steel M type Press fittings and V type Stainless Steel Press fittings pipeline system is widely used in cold and hot water supply, heating supply, fire protection, medicinal gas,
industrial petroleum pipeline system etc.
Compared with traditional pipeline system, it`s not only more economical, safer and healthier, but also easier and faster for
installation with longer service life.

1. Stainless Steel M Type Press Fittings range:
Coupling -- Equal coupling, Reducing coupling, Slip coupling, coupling with male/ female threads;
Elbow -- Equal elbow, Elbow 90°, Elbow 45°, Reducing elbow, Elbow with plain end, Elbow with wall plate, and Elbow with male/ female threads;
Tee -- Equal tee, Reducing tee, Tee with wall plate, and Tee with male/ female threads;
Others-- Pipe cap, Pipe Bridge and Flange connector.
2. Stainless Steel M Type Press fittings Material: Stainless steel 304L, Edelstahl 1.4306/ Edelstahl 1.4301, AISI304L, Inox304L;
Stainless steel 316L, Edelstahl1.4404, AISI316L, Inox316L;
Galvanized carbon steel, 1.0034C-Stahl,Kohlenstoffstahl, ACCIAIO AL CARBONIO.
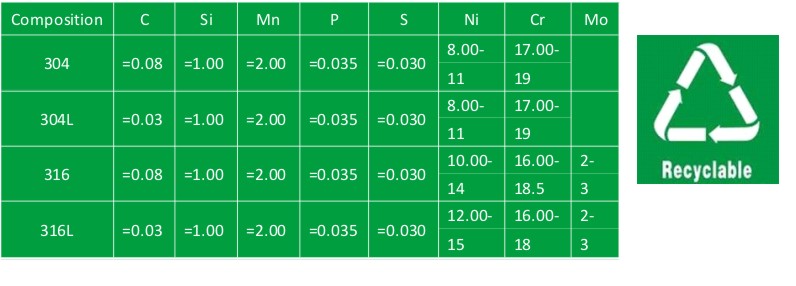
3. Stainless Steel M Type Press Fittings Size: 3/8``-4``inch or as request, pipe wall thickness: 1.0--2.0mm
Sizes range:
DVGW W534:1995: 15, 18, 22, 28, 35, 42, 54, 76.1, 88.9, 108mm.
JIS G 3448-1980: 15.88, 22.22, 28.58, 34.00, 42.7, 48.6, 76.1, 88.9, 108mm.
4. Stainless Steel M Type Press Fittings Standard:
Press fitting standard: (DIN) DVGW W534-1995; (JIS) JWWA G116:2001; GB/T 19228.1-2003
Pipe standard: DIN10312:2003; GB/T 19228.2-2003
O-ring sealing standard: CEN EN 681-1:2006; GBT 19228.3-2003
5. O-Ring Seal: "Chlorinated butyl rubber" (CIIR), EPDM, HNBR, NBR and FKM, etc.
EPDM (black): max working pressure 16bar, working temperature from -20℃ to 120℃,
Suit medium: cold and hot water, compressed Air etc.
6. Press Fittings Galvanization: all carbon steel pipe fittings are plated with rust-resistant zinc.
7. Anneal: all stainless steel M type press fittings are annealed in inert gases before packing.
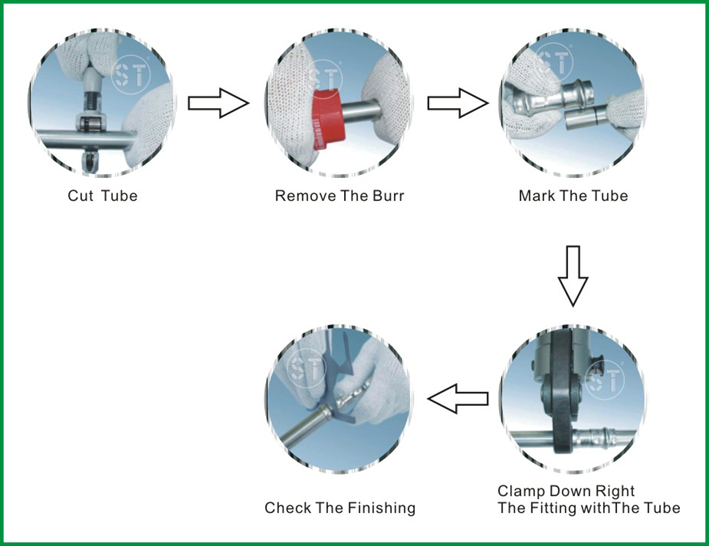
Stainless Steel Press Fittings Installation and Connection Order
Equipments And Quality Control
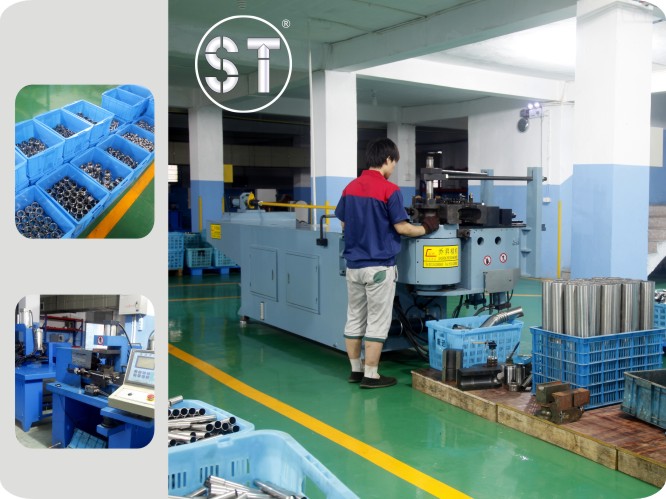
Orderly Workshop
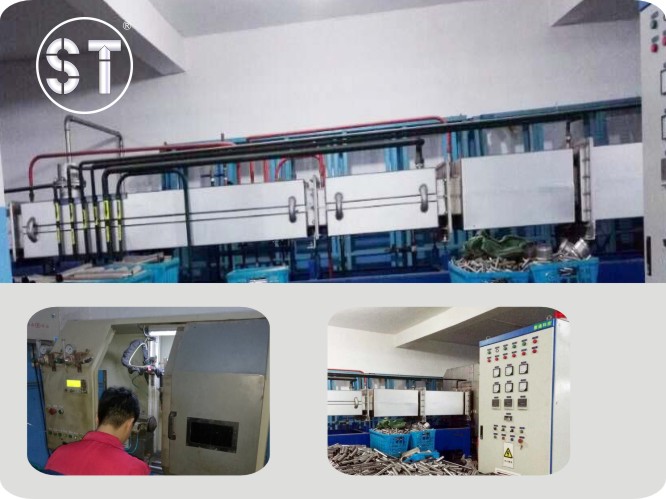
Efficient Anneal Equipment
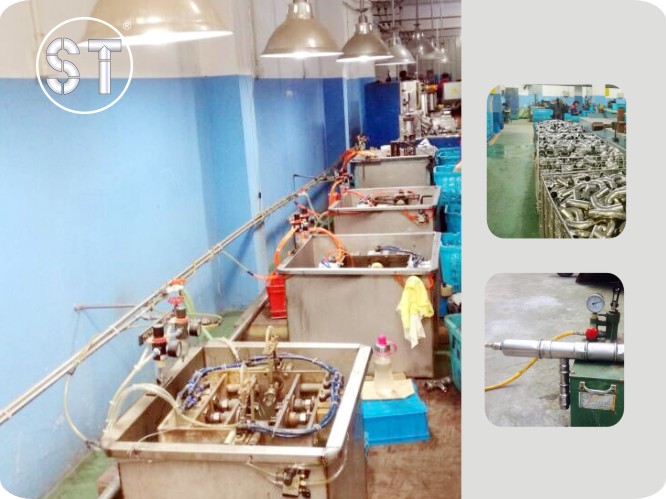
Pressure Testing
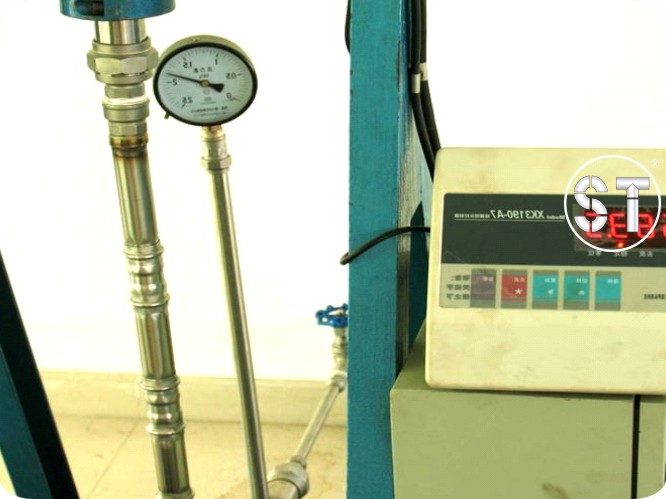
Tensile Testing
Stainless Steel M Profile Press Fittings(DVGW)
Stainless Steel M Profile Press Fittings,Female Tee Press Pipe Fitting,Stainless Steel M Type Press Fittings,Din Standard Press Fittings
WENZHOU KASIN VALVE PIPE FITTING CO., LTD. , https://www.kasinvalvefitting.com